Background
Microsoft have released 3 new Azure DevOps tasks to support the upcoming preview of Azure DevOps hosted builds, which will enable building without a dedicated server hosting the build agent.
The tasks are;
- Create Deployable Package
- Add Licenses to Deployable Package
- Update Model Version
 |
| Add tasks from Dynamics 365 Finance and Operations Tools |
Information about all 3 new tasks has been posted on release by Microsoft's Joris de Gruyter here;
https://community.dynamics.com/365/financeandoperations/b/newdynamicsax/posts/azure-devops-tasks-for-packaging-and-model-versioning
Create Deployable Package Task
Initially I have been trying out the Create Deployable Package task, and this article will demonstrate how to implement it to replace the Generate Packages powershell build task, which currently Packages our built binaries for release. This example only produces a package of binaries, and not a package for the model (source code).
I've chosen to try out this task first as it brings immediate benefits for all my existing release pipelines. It allows us to specify the name of the package we create and upload to Azure DevOps Build Artifacts, which is important later in the Release Pipeline.
The existing Powershell task, which uses GeneratePackage.ps1 from the DynamicsSDK folder, generates a package filename which contains the build of D365FO from the build box which is hosting the agent.
 |
| Powershell generated package name |
When we later pick this filename up as a source artifact in the release pipeline, we don't have a Pipeline Variable for the D365FO version like we do for the build number. This means that every time a one version update is applied to the build box, that filename will change, and all our release pipeline definitions will need to be updated. The Create Deployable Package task allows us to set the filename for the Azure DevOps build artifact.
For this example you will need an existing build definition, and an existing release pipeline which uses the generated package.
If you are looking for how to set up an Azure DevOps Release Pipeline, start here;
Azure DevOps Release Pipeline for Dyn365FO - Part 1: Automated Package Upload & Deploy via LCS API
Azure DevOps Release Pipeline for Dyn365FO - Part 2: Scheduled Releases with Approvals
If you have already setup a release pipeline using the task to upload an Asset to LCS and deploy it to an environment, the latest Tasks will already be installed on your Azure DevOps instance as part of Dynamics 365 Finance and Operations Tools, so I won't cover installing them, and assume they are already there.
Step 1 - Modify the Build Pipeline
Browse to Pipelines then Builds in Azure DevOps.
 |
| Azure DevOps Pipelines |
At this stage I almost always click on the 3 dots in the top right and Clone the build definition before going any further.
 |
| Clone a build definition |
Click on Edit on your original or cloned build definition.
With the build pipeline open for editing, browse to the generate packages Powershell task.
 |
| Generate Packages Powershell Task |
In case you have it named differently, it is the Poweshell task which runs GeneratePackages.ps1 from the DynamicsSDK folder on the Build VM
 |
| Generate Packages Task Properties |
Right click this step, and chose Disable selected task(s). It can be deleted later, but we can keep it here in a disabled state for reference for now.
 |
| Disable selected task |
In this example there is a single task which drops the package straight into the staging directory for upload.
Click the + at the top of the build phase to add a new task;
 |
| Add task to Build Phase |
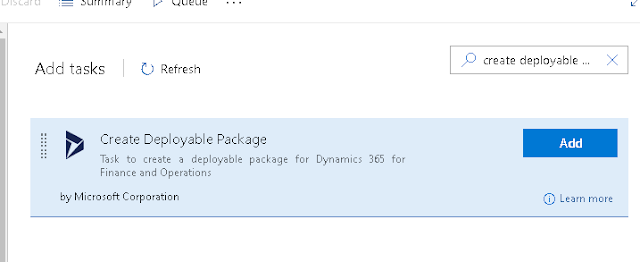
Search for Create Deployable Package, and add the task below.
 |
| Add Create Deployable Package Task |
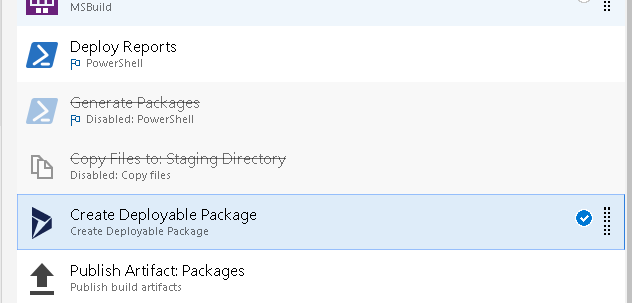
Drag the new task to be in the same position as the disabled Powershell task. It should be after Build, Synchronise, Deploy Reports, and be before Publish Build Artifacts.
 |
| Position of new task in build phase |
Set the field X++ tools path to AOSService\PackagesLocalDirectory\Bin wherever that is located on your build VM.
If the build agent is on a cloud hosted VM, it is likely to be K:\AOSService\PackagesLocalDirectory\Bin.
If the build agent is on a Local VM, is will be C:\AOSService\PackagesLocalDirectory\Bin.
Set the Location of X++ binaries to package to the output folder from the MSBuild task.
 |
| MSBuild OutputPath Parameter |
It's likely to be $(Agent.BuildDirectory)\Bin as per the above screenshot.
Leave the Search pattern for binaries to package as *. This field can be used to exclude files and folders from the final package.
Set the field Filename and path for the deployable package to the publish artifact staging directory from the Path to publish field, plus a filename. In this example it is $(Build.ArtifactStagingDirectory)\Packages\AXDeployableRuntime_$(Build.BuildNumber).zip.
 |
| Create Deployable Package Properties |
Note that we have set the filename to AXDeployableRuntime_$(Build.BuildNumber).zip.
Build.BuildNumber is a pipeline variable we have access to when setting up the release pipeline, so the filename is unique but not dependant on the D365FO version as it was previously.
Save & queue a build.
When the build completes, the Package is published to Artifacts with the new filename.
 |
| Build Artifact Name |
Step 2 - Modify the Release Pipeline
Now that the published build artifact is renamed, any release pipelines referencing the package need to be updated.
Browse to Pipelines and Releases, and click edit on the Pipeline you need to change. As with the build, I would work on a copy of the pipeline by firstly clicking on the 3 dots in the top right and selecting Clone.
If you cloned the build definition in Step 1, you will first need to add a new artifact. Select the existing artifact and click delete in the top right of the properties dialog.
 |
| Delete Artifact |
Add a replacement Artifact. Select the source as your new build pipeline.
 |
| Add Artifact Dialog |
Now find the stage which contains your LCS Asset Upload task and select if for editing.
 |
| File to Upload |
In the File to upload field, browse to the new package file. Replace the build number with the pipeline variable $(Build.BuildNumber).
Either create a release now or wait for the next schedule to test.
Done. The next time a one version update is applied to the server hosting the build agent for this pipeline, no action will be needed to update the File to upload field with the new version number.
Edit: Since writing I have followed this up with an article on how to include your source controlled ISV binaries in the deployable package generated by this Azure DevOps build task. You can read it here;
Azure DevOps for Dyn365FO Create Deployable Package - Include Source Controlled ISV Binaries